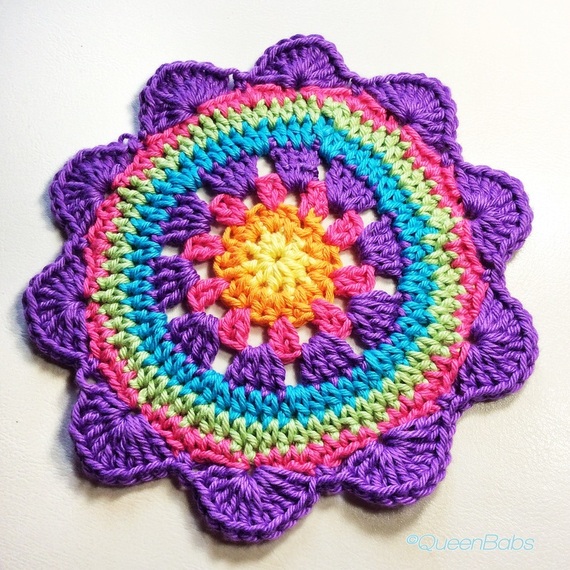
The courage flower - extended
“Courage doesn't always roar. Sometimes courage is the little voice at the end of the day that says I'll try again tomorrow.” Mary Anne Radmacher
The Extended Courage Flower - English version
Complete the flower as for Rounds 1 to 5, then add the following new rounds.
Round 6
Attach new colour in the middle of any 2 hdc. Chain 2 (equals 1 hdc), in the next 4 st work 1 hdc, then 2 hdc in the following st. * In the next 5 st work 1 hdc, then 2 hdc in the next. *
Continue from * to * around. Ss into the top of the ch 2.
Round 7
Attach new yarn in the middle of any 2 hdc of the previous round. Chain 1 and sc in the same st (equals 2 sc). * Sc in the next 6 st, then 2sc in the next st. *
Repeat * to * around. Ss in the ch 1.
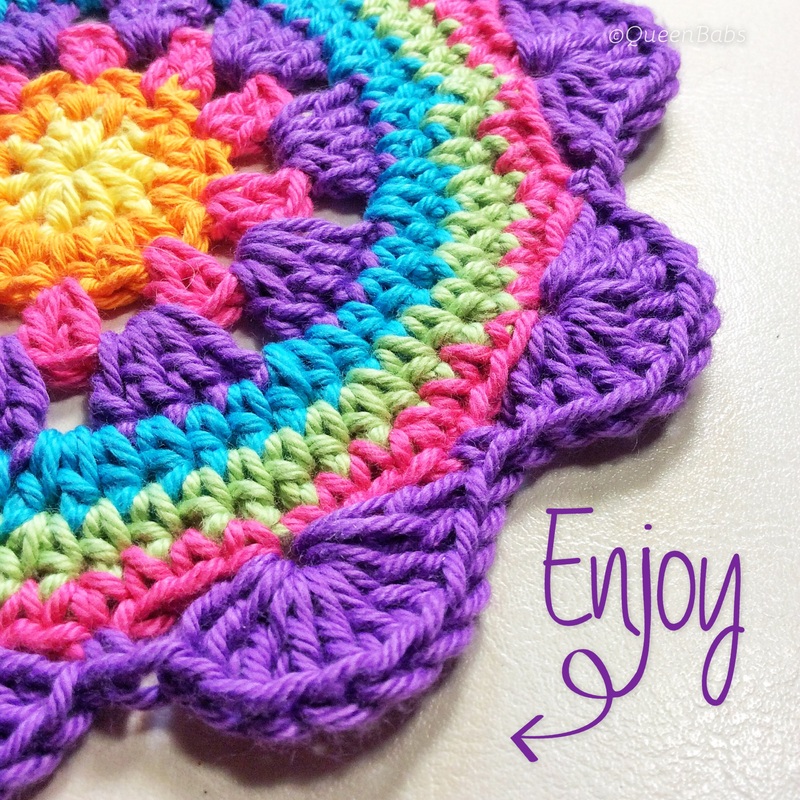
Round 8 (Scallops)
Attach new yarn in any sc of the previous round.
* Skip 3 st, work 10dc in the next st, skip 3 st, sc in next st. * Repeat from * to * around (10 scallops).
Finish off and weave in ends.
Complete the flower as for Rounds 1 to 5, then add the following new rounds.
Round 6
Attach new colour in the middle of any 2 hdc. Chain 2 (equals 1 hdc), in the next 4 st work 1 hdc, then 2 hdc in the following st. * In the next 5 st work 1 hdc, then 2 hdc in the next. *
Continue from * to * around. Ss into the top of the ch 2.
Round 7
Attach new yarn in the middle of any 2 hdc of the previous round. Chain 1 and sc in the same st (equals 2 sc). * Sc in the next 6 st, then 2sc in the next st. *
Repeat * to * around. Ss in the ch 1.
Round 8 (Scallops)
Attach new yarn in any sc of the previous round.
* Skip 3 st, work 10dc in the next st, skip 3 st, sc in next st. * Repeat from * to * around (10 scallops).
Finish off and weave in ends.
The Extended Courage Flower - Czech Version
Translated by Romana IG @mumakaro
Translated by Romana IG @mumakaro
ROZŠÍŘENÁ VERZE KVĚTNY ODVAHY
Uháčkujte květinu stejně od bodu 1 po bod 5 a přidejte následující nové řady
6. ŘADA
7. ŘADA
8. ŘADA - lastury
Uháčkujte květinu stejně od bodu 1 po bod 5 a přidejte následující nové řady
6. ŘADA
- přidejte novou barvu uprostřed kteréhokoliv 2 PDS
- 2 ŘO (počítá se jako první PDS)
- do dalších 4 ok uháčkujte 1 PDS do každého
- 2 PDS do následujícího oka
- * do dalších 5 ok uháčkujte po 1 PDS; 2 PDS do dalšího oka*
- zopakujte od * do * a PO do vrchu prvního 2 ŘO
7. ŘADA
- přidejte novou barvu uprostřed kteréhokoliv 2 PDS z předešlé řady
- 1 ŘO a 1 KS do stejného oka (odpovídá 2 KS)
- *1 KS do dalších 6 ok; 2 KD do dalšího oka*
- zopakujte od * do * okolo celé květiny
- PO do dalšího oka
8. ŘADA - lastury
- přidejte novou barvu do kteréhokoliv KS z předchozí řady
- *vynechte 3 oka a 10 DS do dalšího oka; vynechte 3 oka; 1 KS do dalšího oka*
- zopakujte okolo celé květiny (10 lastur)
- dokončete a zapošijte konce příze
The Extended Courage Flower - German Version
Translated by Sade IG @smilewithsade
Translated by Sade IG @smilewithsade
Die Erweiterte Mutblume (Courage Flower)
Vervollständige die Blume gemäß der Runden 1 bis 5 und ergänze anschließend die folgenden neuen Runden.
Runde 6
Befestige eine neue Farbe in der Mitte von 2 beliebigen hStb. 2 Lm (entspricht 1 hStb), jeweils 1 hStb in die nächsten 4 M, 2 hStb in die nächste M.
* Jeweils 1 hStb in die nächsten 5 M, 2 hStb in die nächste M. *
Wiederhole * * bis zum Ende der Runde.
Ktm in die zweite Lm des Rundenanfangs.
Runde 7
Befestige eine neue Farbe in der Mitte von 2 beliebigen hStb der vorherigen Runde. 1 Lm und 1 fM in die gleiche M (entspricht 2 fM).
* Jeweils 1 fM in die nächsten 6 M, 2 fM in die nächste M. *
Wiederhole * * bis zum Ende der Runde. Ktm in die erste Lm des Rundenanfangs.
Runde 8 (Muschelmuster)
Befestige eine neue Farbe an einer beliebigen fM der vorherigen Runde. Überspringe 3 M, 10 Stb in die nächste M, überspringe 3 M, 1 fM in die nächste M. *
Wiederhole * * bis zum Ende der Runde. (10 Muscheln)
Schneide das Garn ab und vernähe es.
The Extended Courage Flower - Spanish Version
Translated by Veronica Preiti IG @wintervisigoth
Translated by Veronica Preiti IG @wintervisigoth
Completar la flor siguiendo las instrucciones desde la vuelta 1 a la 5 y luego agregaremos tres vueltas más.
Abreviaturas:
C - cadena
Pb- punto bajo
Mv - media vareta
V- varetas
Pd - punto deslizado
P- punto
Vuelta 6
Unimos el nuevo color en el medio de cualquier espacio entre 2mv de la vuelta anterior. Subimos 2 cadenas ( eso equivale a 1mv). En los 4 siguientes p vamos a tejer 1mv por p , luego, en el siguiente p tejemos 2mv en un mismo p.
*En los siguientes 5 p tejemos 1 mv en cada p. Luego , en el siguiente p tejemos 2 mv en un mismo p *
Continuamos repitiendo lo que esta entre * hasta completar toda la flor . Cerramos con un pd en en 2do p de la cadena de subida.
Vuelta 7
Unimos el nuevo color en el medio de cualquier espacio entre 2 mv de la vuelta anterior. Subimos 1 c y un pb en el mismo p. ( Equivale a 2 pb)
*Tejemos un pb en los 6 siguientes p. Luego, en el siguiente p tejemos 2 pb en el mismo punto *
Repetir lo que está entre * hasta completar la flor. Cerramos con un pd en la primera c que tejimos.
Vuelta 8 (abanicos)
Unimos el nuevo hilo en el medio de cualquier espacio entre 2pb de la vuelta anterior. Hacemos un pb. Saltamos 3 p . En el cuarto p tejemos 10 v y saltamos 3 p. tejemos un pb en el cuarto punto. Repetimos todo alrededor de la flor hasta competar 10 abanicos.
The Extended Courage Flower - Turkish Version
Translated by Oya Mearns IG @oyamearns
Translated by Oya Mearns IG @oyamearns
Genişletilmiş ‘Courage’ Çiçek Motifi
‘Courage’ Çiçek Motifinde anlatılan ilk 5 sıra yapıldıktan sonra aşağıda anlatıldığı sşekilde devam edin:
Orijinal tabloda kullanılan sembollerin anlamı:
ch: zincir
sc: Sık iğne
hdc: yarım trabzan (tek çekişli trabzan)
dc: 2 çekişli trabzan
ss: ilmek kaydırma
st: ilmek
SIRA 6:
Yeni bir renk ile herhanği bir 2’li yarım trabzanların arasındaki boşluktan başlayın. 2 zincir çek(bu 1 adet yarım tırabzan sayılacak), takip eden 4 ilmeğe 1 er adet yarım trabzan yap ve sonraki ilmeğe 2 tane yarım trabzan yap.
*takip eden 5 tane ilmeğin her birine 1’er tane yarım trabzan yap, ve sonraki ilmeğe 2 adet yarım trabzan yap*
*işaretlerinin arasını tekrar et. En sonunda yine ilk yaptığın 2 zincirin ikincisiyle birleştir.
SIRA 7 :
Yeni bir renk ile herhangi bir 2’li yarım trabzanın arasındaki boşluktan başla. 1 zincir çek, aynı ilmeğe 1 tane sık iğne yap (bunlar 2 adet sık iğne olarak sayılacak).
*takip eden 6 tane ilmeğin her birine 1 adet sık iğne yap, sonraki ilmeğe 2 tane sık iğne yap*
*işaretlerinin arasını tekrar et. En sonunda yine birleştir.
SIRA 8:
(Deniz Kabuğu Motifleri)
Yeni renkle herhangi bir sık ığne ilmeğinden basla, 3 ilmek atla, sonraki ilmeğe 10 adet iki çekişli trabzan yap, 3 ilmek atla, … bu şekilde devam et. Sonunda 10 tane deniz kabuğu motif yapmış olacaksınız.
Tebrikler! Bitti. Sarkan ipliklerinizi de toparlayıp düzenlediğinizde çiçeğiniz ortaya çıkacakJ
