How to cover a wooden coat hanger
A note on yarn, hooks and stripes
I chose cotton blend 8ply yarn, but you can use anything you like. It will be easier with Sport, DK or Worsted weights. Use any yarn you like : cotton, acrylic or wool! I used a 4mm hook with my 8ply cotton blend yarn. Use any hook appropriate to the size to keep your stitches compact.
As I like stripes I chose 3 colours, but you could have one colour or as many as you like. My stripes repeat but random would work well too. For a beginner I suggest 4cm stripes if you want to add the scallops. The scallops and decorations are optional.
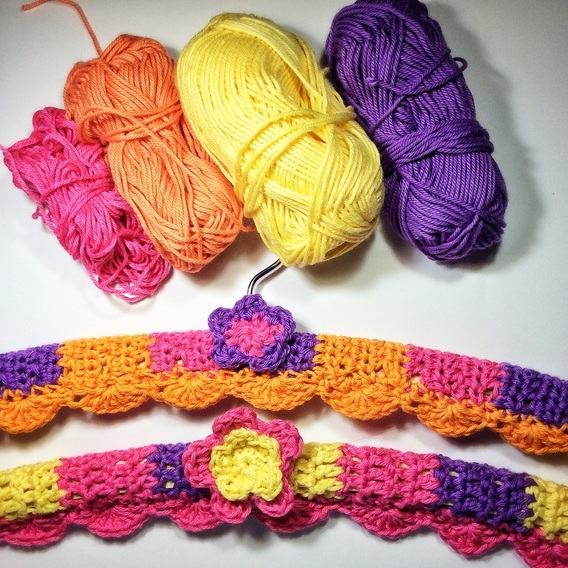
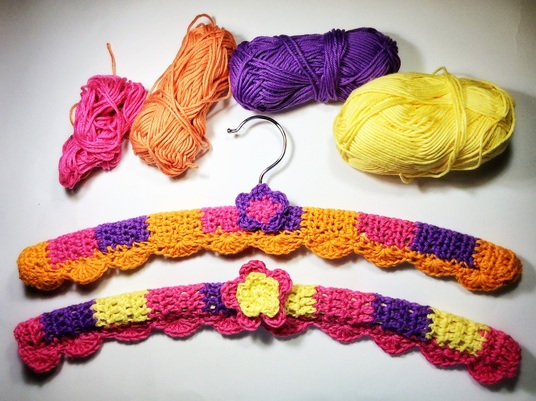
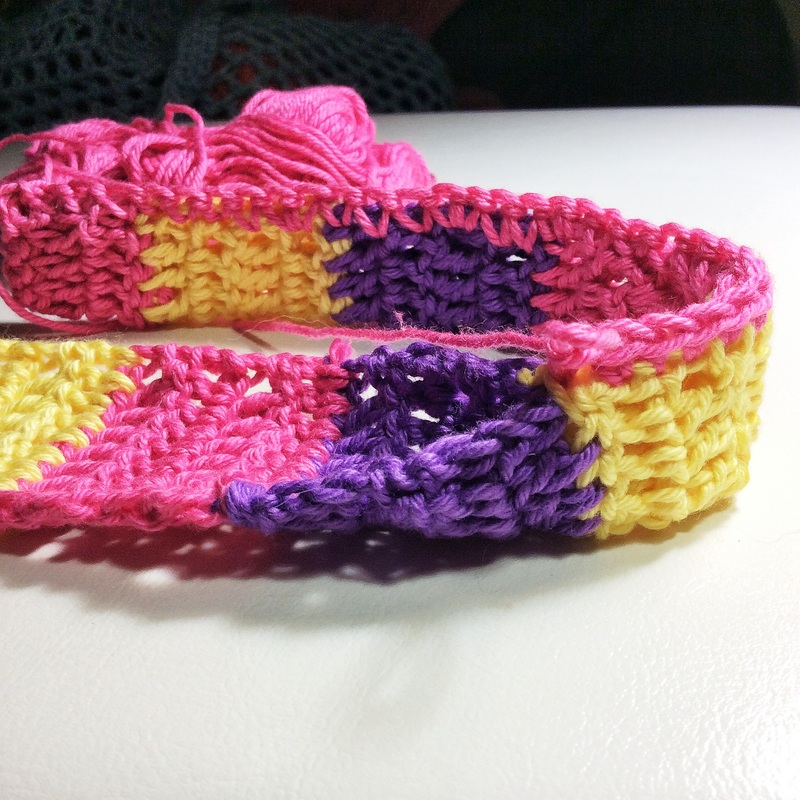
The top hanger uses half double crochet (hdc), while the bottom one uses double crochets (dc).
The yarn is the same in both: 8ply cotton blend. Both stripes are 4cm wide.
Choosing your stitch length
For a very tight stitch use sc only.
For a compact stitch use hdc.
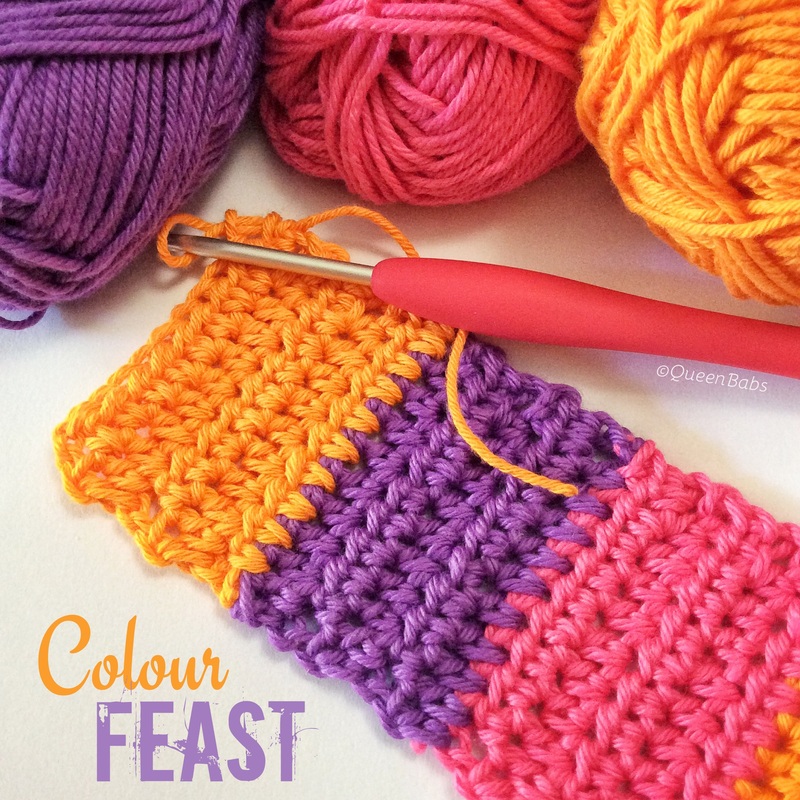
For a looser stitch (where you may have a few gaps) use dc.
The cotton suited sc and hdc best, but a fluffier, fuller yarn would be fine with dc. I have a photo above to show you the difference in look if you use dc in the cotton.
Your stitch choice influences your number of rows. For example using dc in cotton I did 4 rows per colour in the main body of the hanger. Using sc I did 7 rows per colour for the same length. It is up to you.
For a very tight stitch use sc only.
For a compact stitch use hdc.
For a looser stitch (where you may have a few gaps) use dc.
The cotton suited sc and hdc best, but a fluffier, fuller yarn would be fine with dc. I have a photo above to show you the difference in look if you use dc in the cotton.
Your stitch choice influences your number of rows. For example using dc in cotton I did 4 rows per colour in the main body of the hanger. Using sc I did 7 rows per colour for the same length. It is up to you.
US terms
Ch – chain
Sc – single crochet
Hdc – half double crochet
Dc – Double crochet
Ss – Slip stitch
St – Stitch
Sp – space
Instructions
1. Measure around your wooden coat hanger. Mine are 5cm or 2 inches around. It is almost 40cm or 16 inches long.
Ch – chain
Sc – single crochet
Hdc – half double crochet
Dc – Double crochet
Ss – Slip stitch
St – Stitch
Sp – space
Instructions
1. Measure around your wooden coat hanger. Mine are 5cm or 2 inches around. It is almost 40cm or 16 inches long.

2. Make enough chains to stretch around the hanger (for me 5cm) and meet. Then add 2 chains. (The number will vary depending on your yarn type and weight and your tension.) Then add 2 chains. I had 8 + 2 = 10
3. Sc into the 2nd chain from the hook. Then work an sc in each st to the end.
4. Now wrap it around your hanger again and check it stretches around. If it is not the right size adjust by adding or subtracting chains from your beginning row, then repeat the sc row and check again.
5. Now you choose the stitch length you are going to use and work in that stitch until the last row where you repeat a row of sc. My stripes are 4cm long and I have 10 of them as the hanger is just under 40cm. (A little of the end is lost from sewing it together. Make your cover just long enough without too much over.)
6. Each row after the first sc foundation row works in this manner - (choose your stitch length)
7. Continue in this way, changing yarn colours as desired making the last row sc only until you have the full length of your hanger. (A little of the end is lost from sewing it together. Make your cover just long enough without too much over.)
Now choose instructions for scallops or no scallops.
3. Sc into the 2nd chain from the hook. Then work an sc in each st to the end.
4. Now wrap it around your hanger again and check it stretches around. If it is not the right size adjust by adding or subtracting chains from your beginning row, then repeat the sc row and check again.
5. Now you choose the stitch length you are going to use and work in that stitch until the last row where you repeat a row of sc. My stripes are 4cm long and I have 10 of them as the hanger is just under 40cm. (A little of the end is lost from sewing it together. Make your cover just long enough without too much over.)
6. Each row after the first sc foundation row works in this manner - (choose your stitch length)
- a. Ch 1, turn. Work one sc in each of the st of the previous round or
- b. Ch 2, turn. Work one hdc in each of the st of the previous round or
- c. Ch 3, turn. Work one dc in each of the st of the previous round.
7. Continue in this way, changing yarn colours as desired making the last row sc only until you have the full length of your hanger. (A little of the end is lost from sewing it together. Make your cover just long enough without too much over.)
Now choose instructions for scallops or no scallops.

Instructions if you want Scallops for 4cm stripes
1. Finish off crocheting your last st. Fold the hanger cover in half right sides out and neatly sew the end together you just completed. Weave in the end.
2. Attach yarn in the first st on the open side (as shown in the photo above) and work an sc into the same st.
1. Finish off crocheting your last st. Fold the hanger cover in half right sides out and neatly sew the end together you just completed. Weave in the end.
2. Attach yarn in the first st on the open side (as shown in the photo above) and work an sc into the same st.
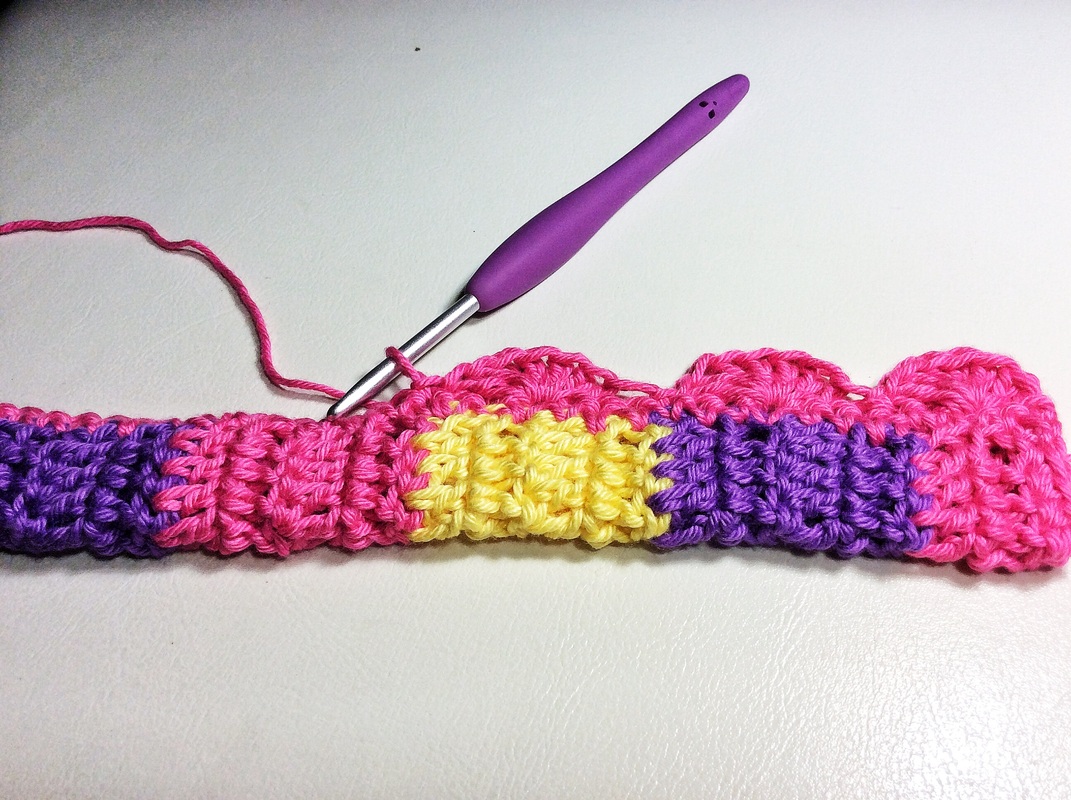
3. Continue carefully crocheting sc along the open edge to close it and provide a base for the scallops. (As shown in photo)
4. When you reach the last st, work the sc and ch 1, then turn.
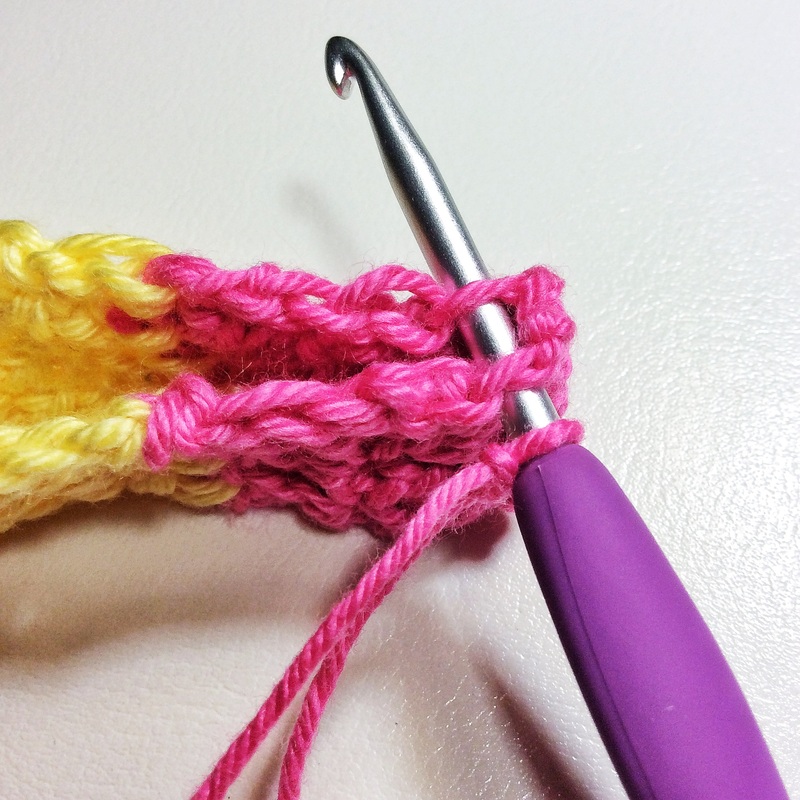
5. Find the sc in the middle of the 4cm stripe and work 7 dc in that same st. (As shown in photo)
6. Now find the sc at the end of the same stripe and sc into that st.
7. You will repeat this for each 4cm stripe. Work 7 dc into the middle sc of the stripe, then sc in the last st of the stripe. In the last 4cm stripe continue as normal but ss into the last st instead of the sc. Finish off and leave a long tail for sewing.
4. When you reach the last st, work the sc and ch 1, then turn.
5. Find the sc in the middle of the 4cm stripe and work 7 dc in that same st. (As shown in photo)
6. Now find the sc at the end of the same stripe and sc into that st.
7. You will repeat this for each 4cm stripe. Work 7 dc into the middle sc of the stripe, then sc in the last st of the stripe. In the last 4cm stripe continue as normal but ss into the last st instead of the sc. Finish off and leave a long tail for sewing.
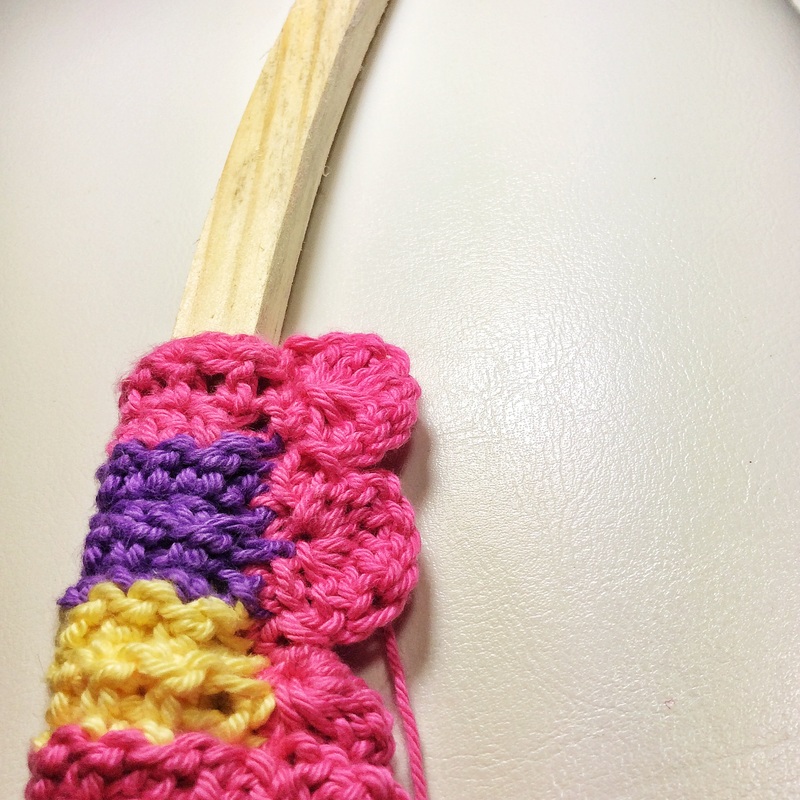

8. Pull the cover on like you would a sock on a foot, easing it up the hanger carefully. Use the long tail you left to sew the end closed neatly. Finish off and weave in all ends.
9. Work the metal hanger into the pre-drilled hole. Then decorate if wanted.
9. Work the metal hanger into the pre-drilled hole. Then decorate if wanted.
Instructions if you don’t want Scallops
1. Finish off the last row. Weave in ends.
2. Fold the hanger cover in half, wrong sides out. With a yarn needle and 60cm of yarn, neatly sew one end together and continue along the sewing the long open side together. Do not sew the other end!!!
3. Turn the hanger ‘sock’ inside out pushing the right side out. A chopstick or long pencil may help here to push it out.
4. Pull the cover on like you would a sock on a foot, easing it up the hanger carefully. Use the long tail you left to sew the end closed neatly. Finish off and weave in all ends.
5. Work the metal hanger into the pre-drilled hole. Then decorate if wanted.
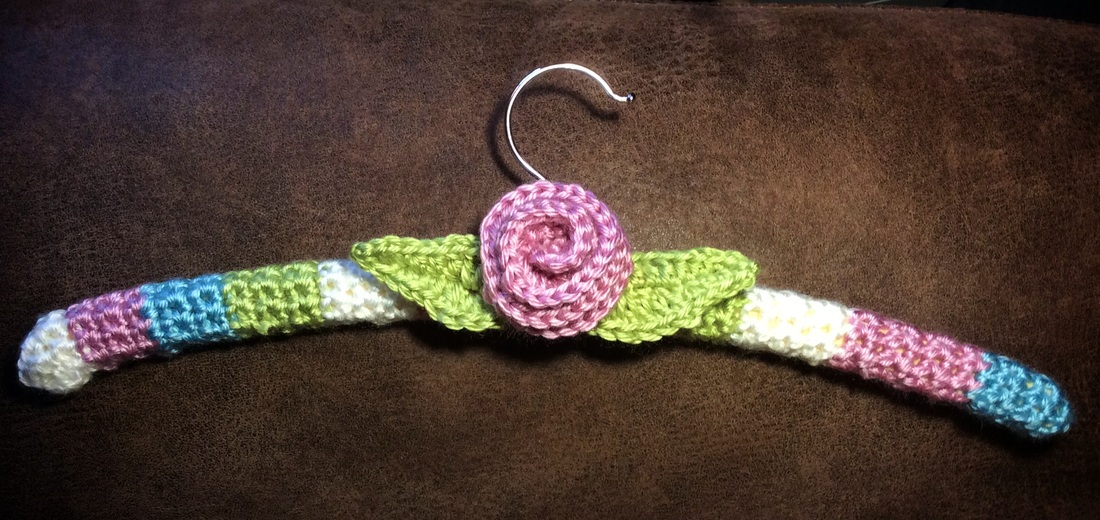
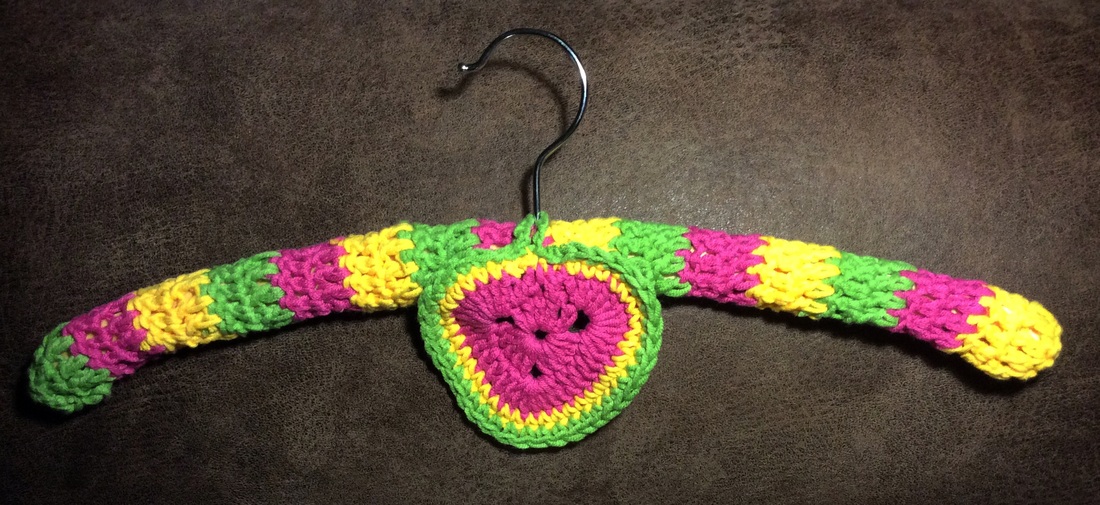
Decorating the hanger
Add anything you like! The Tiny Fairy Flower (free pattern here) is a good size for this project or the Full Heart pattern (free pattern here) but there are many cute embellishments you can add.
I sew then on afterwards so I can place them just where I want. Sew on as neatly as possible and weave in the ends!
Lastly
Admire your work! The next one will be much easier now you know what you are doing.
I would love to see it if you make anything from our free patterns here. Tag me on Instagram @queen_babs or post it onto my Facebook page!
Enjoy!
Queen Babs
Admire your work! The next one will be much easier now you know what you are doing.
I would love to see it if you make anything from our free patterns here. Tag me on Instagram @queen_babs or post it onto my Facebook page!
Enjoy!
Queen Babs
